
We have much to catch up on: Murray! Yay! Summer! Yay! Holiday! ...over. Boo - but I return inspired and eager to get cracking on these projects that are building up and keep getting added to various lists. First up, I finally got round to this mini project: Animal head pins.
A B&M store opened recently near me and it is the perfect place to walk around and kill an hour of time with endless aisles of cheap goodies. I'd been searching for some cheap, plastic animal toys, but had struggled to find a pack the right size. I found a collection of 5 farm animals for £1.99 which were perfect, so it was worth waiting and searching for. I have a pig, sheep, cow, donkey and horse:
 To make this project even simpler, I could have left the animals decorated as they were, however; to tie them all together, I wanted them all to be silver. I didn't have can of spray paint to hand, so went for the next best thing - silver nail polish. I have so many nail polishes, I pretty much have all colours covered, so if you have small items that you want decorated, I thoroughly recommend nail polish as an alternative. It comes with a brush you don't need to clean, only requires one coat and dries pretty quick.

I covered the entire head area with one coat of the polish and left for a few minutes to dry:


Then I chopped it off. Using nail scissors.
 Is this barbaric?

I found my nail scissors were perfect for piercing the plastic and then getting an even line, but I think small scissors in general would be just as good. My animals were hollow, but if you find solid figures, I would recommend a sharp knife or saw [if you have one] - whatever you use, be careful and safe!
I touched up any of the polish along the cut, then rested the head so that I could fill it with glue
[I just used pva as that's all I have]:
 ...and then took a pin with a tall head and aligned it to match the pin with the cut off of the head:
 [You could attach a flat pin with superglue]
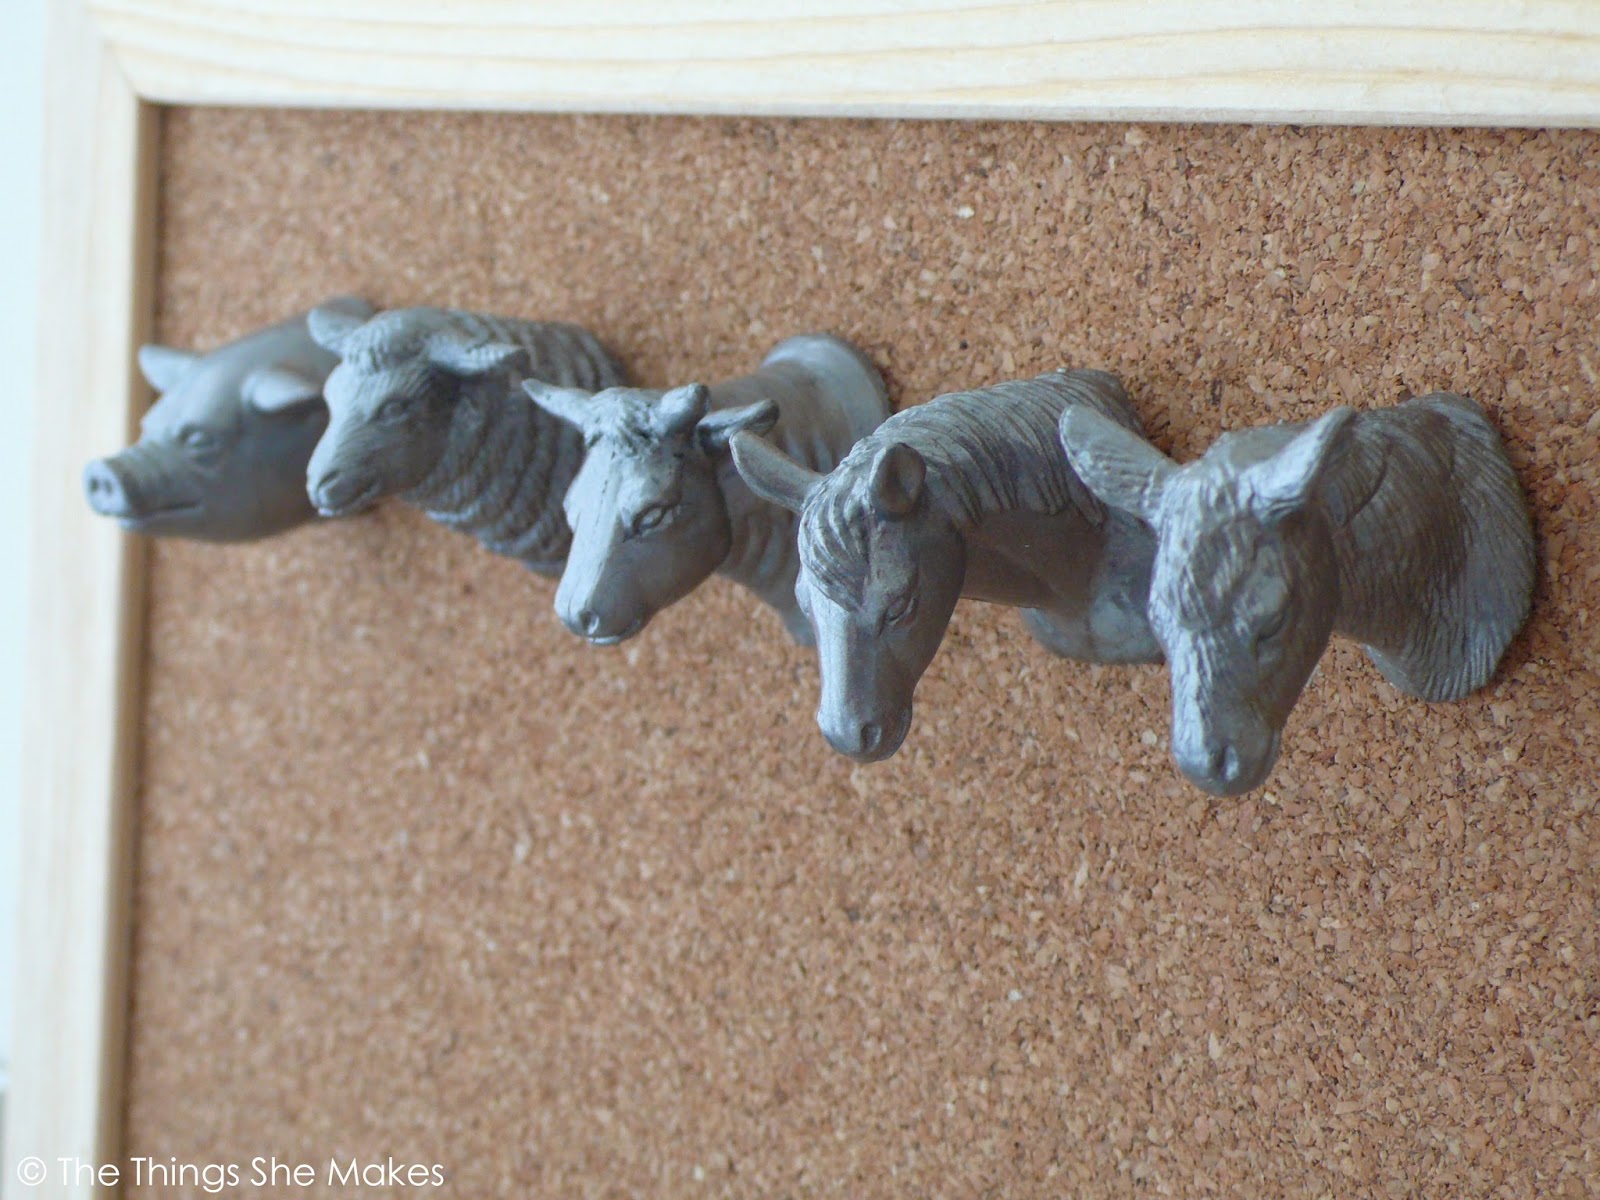
Leave to dry overnight [at least] and make sure it's secure, before pinning to your board:


[I just used pva as that's all I have]:


Leave to dry overnight [at least] and make sure it's secure, before pinning to your board:


so I may as well make them seem more exciting with decapitated animals?
 They also come in handy as little hooks for your keys and I'm starting to wonder if I should re-think my entire jewellery organisation to have all my necklaces, bracelets and watch to hang on animal hooks.
See you next time x

See you next time x


