Wednesday 30 April 2014

Spring Folder Makeover

This month, I decided to join in on some Spring craft swaps - and last week, I sent off two packages which were part of the #craftblogclub [I was paired with the very lovely Gude from Hodge Podge] and Dainty and Ivory Spring swaps.  Both were sent at a similar time and I really wanted to make a couple of items to include in the packages that weren't items I had made before, so today and on Friday, I will be sharing how I made two of the items my craft swappers received.  I really hope they liked them.

What I Used:
Plastic Folders [pack of 3 from Sainsburys - £3.99]
Patterned Card
Resin Flowers
Glue / Ruler / Pencil / Scissors / Craft Knife
As a stationery fan, I believe you can never have too many of any of it - and folders are no exception.
This was an easy way to pretty up and make over some plain plastic wallets.
The process is simple, needing no more than to trace the size and shape of he different folder sections on to the back of your card.  Cut ever so slightly smaller than the pattern you create for yourself [this will allow for plenty of movement and expansion] and place:

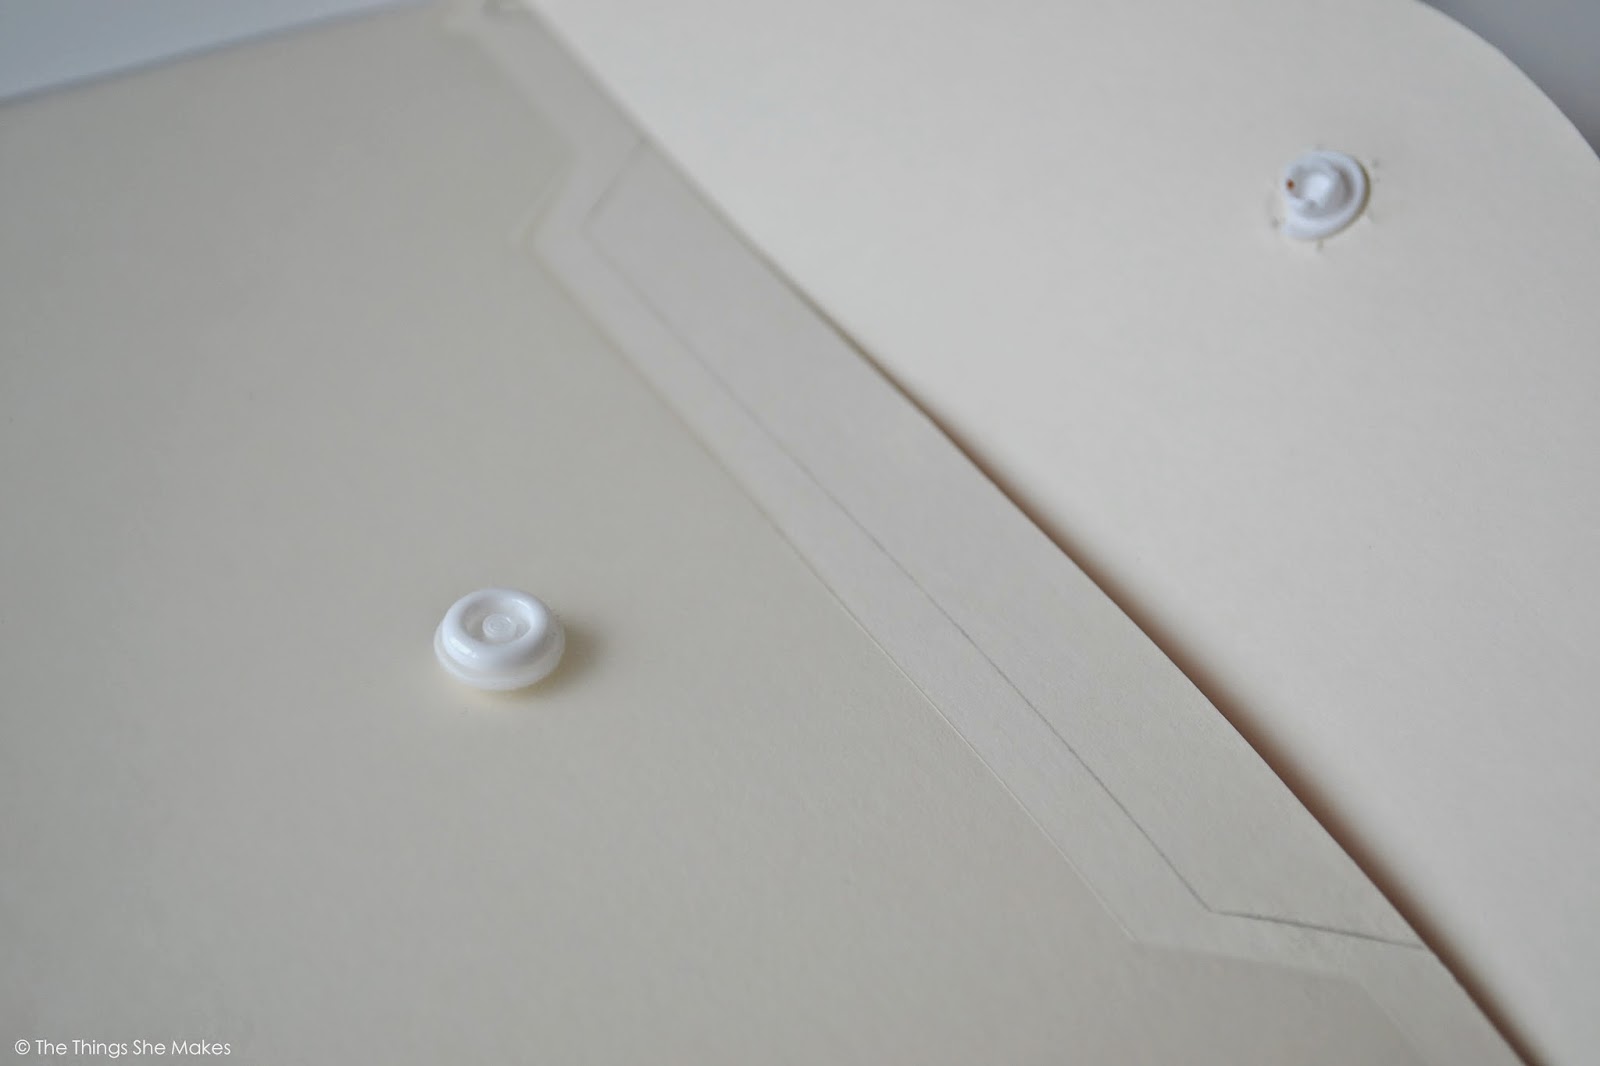
To combat the tricky fastening in the top, I made an impression into the card with the folder and made a small cut with a craft knife to start.  Push the fastening into the hole, which will then allow for an impression of the size to be made.  Make straight cuts from the small hole to the end of the second impression to allow it to push through:
 Hide the excess card by trimming and then tucking under the fastening:
 I then made any final lines to cut:

...and then stuck the card in place permanently with glue:
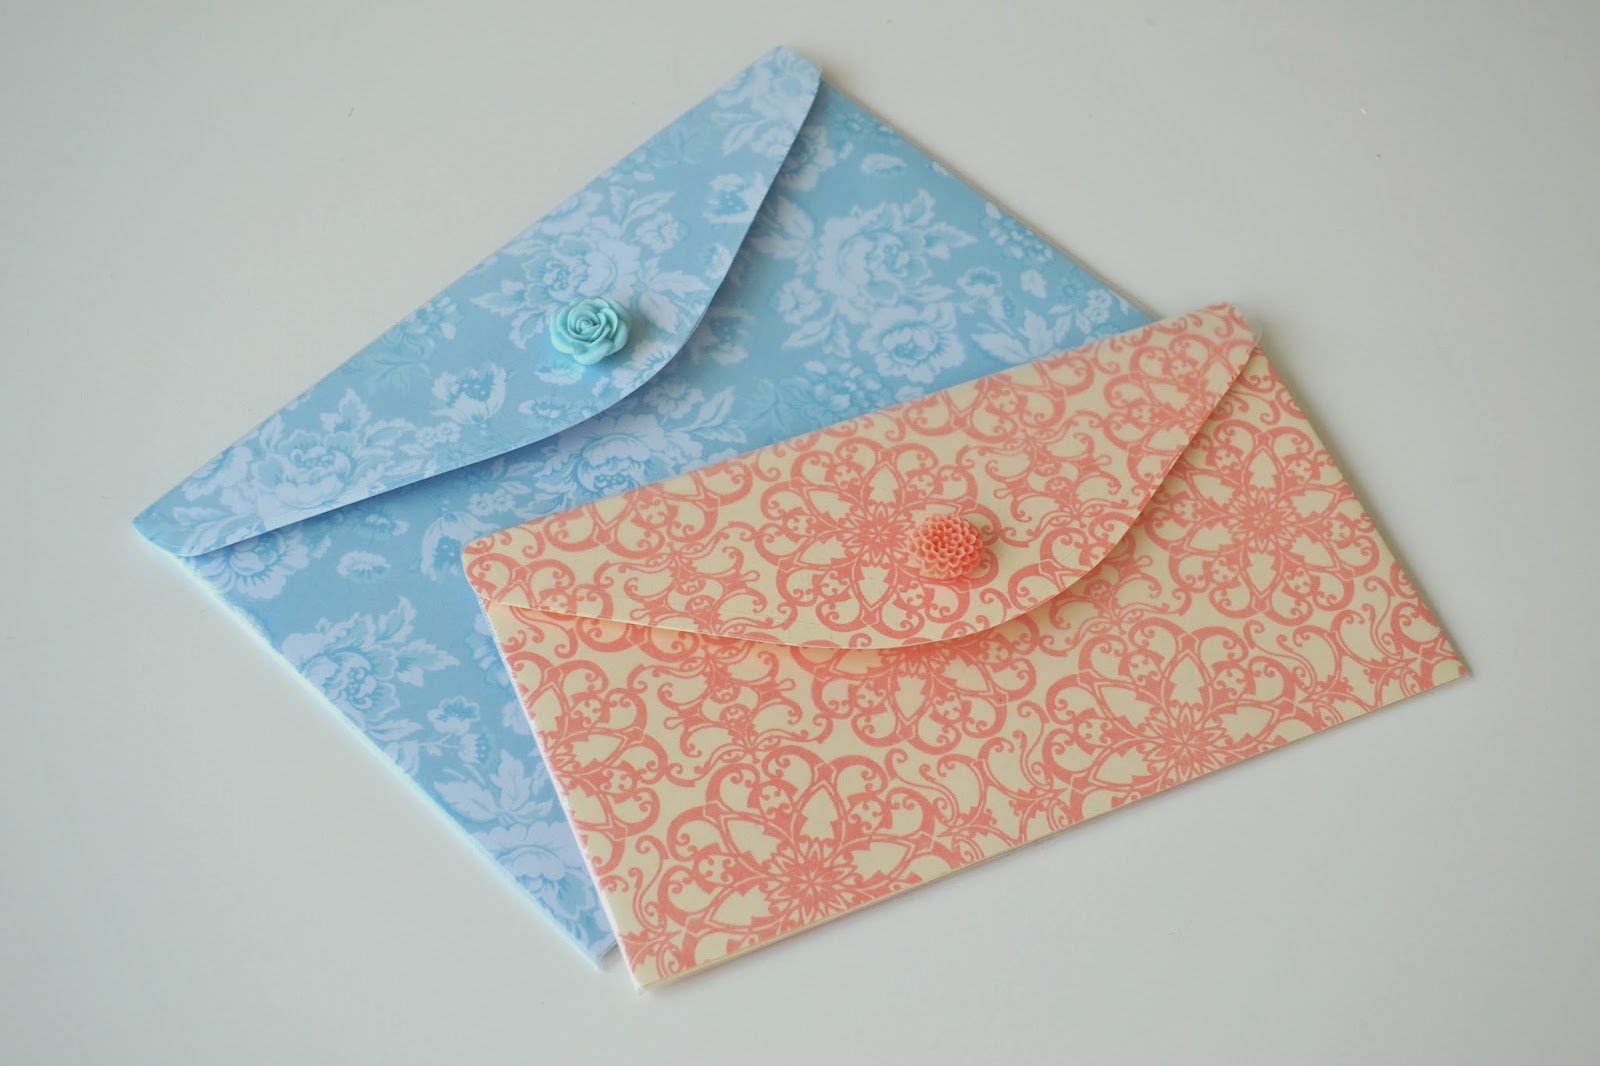
Finally, I added a pretty pastel resin flower to cover the outside of the fastening and finish the folder:
Before repeating the same in blue tones:
.... Two much prettier folders for bits and bobs, papers and storage:
I really hope their new owners like them.
see you next time x
Share:

Monday 28 April 2014

How to Make Meringue Pops

This was always going to happen eventually - meringues on a stick - heaven!  
Can we make this a thing?
I've blogged many a trial of meringues, from kisses to rosesfruitsnestspavlovas and berry cream.  I've also been blogging most recently about lots of experiments and trial runs.  Today is no exception - this was all done in preparation for my Dad's big fab 60th and to see if the idea I had actually worked.

I started by making a batch of whipped meringue [1 egg white to 40g caster sugar ratio] and splitting the mixture into 3.  To each mixture, I added a few drops of gel colouring [gel colouring keeps it's colour in the 'bake'] and created swirls of the colour through each mixture by not mixing it completely:

I then transferred each mixture into a piping bag as I thought this would give me more control on the shapes I wanted to create. Now, I have failed miserably in taking photos of this first stage of the process, so I'll make up for that with the final creation of these meringue pops later in the year.  To start, pipe the shape of meringue on to a baking tray lined with baking paper.  Fill in the shape and this will become your first layer.  Lay a skewer or cake pop stick to the bottom of the shape [at least 2cm into the shape] and then create a second layer of the meringue on top to cover it.

I created letters, shapes and numbers to test out the options:

..also, adding sprinkles for decorations works and looks fab:
Pop in an oven on low heat for around an hour and then allow to cool completely.  Ta-da!
A few pink, yellow and orange ribbons tied to just underneath the meringue, these became fantastic edible wands for my God Daughters:
...I think these will be edible cake toppers when recreated nearer the big birthday.
see you next time x
Share:

Friday 25 April 2014

Spring Necklace Makeover

During the Winter, statement necklaces were perfect for dressing up jumpers and I built myself up a little collection of necklaces from all over the place to add a bit of colour and pretty up an outfit.  Today, I'm taking one of them and changing it a little to soften the look for Spring with nothing more than a few strands of embroidery floss and 30 minutes:
Taking three strands of a similar shade to the gems in my necklace, I plaited a length 1 and 1/2 times the length of the chain - securing the threads in place around 5 cm at either end with a knot:
If you have a little more time and love a friendship bracelet, you could recreate a design into the embroidery floss to add further interest and detail.
Next, I simple threaded the plaited embroidery floss through the chain, weaving through each link:
Secure at each end of the necklace chain in a knot to hold in place.  Voila.  An updated statement necklace for the Spring - which can be continually updated with a change of colours, type of thread, number of threads used and patterns created with knots and plaits.  You could even thread on beads to add a bit of texture - give it and try and if you do, let me see!
see you next time x
Share:

Thursday 24 April 2014

Canvas Cake Banners

The Bank Holiday [in the UK] weekend was a brilliant opportunity for me to tick another project off the 5 year old to-do list.  Well, at least make a start on it - so today I'm sharing the first version of a personalised cake topper - the banner garland.  All the cake toppers I am going to create will be based using these canvas fabric cuts - bought from my second home, Hobbycraft [p.s. they are on sale]:
Other than the strips, the only other materials needed are a pencil, ruler, template, scissors, pens/paint thread and needle/glue.  The templates to create my banners were made using the back of a packaging board and pencil and ruler to keep everything uniform - but you can create any shape/size you need:
Cutting out my template, I then drew round the template several times on to the canvas fabric in pencil and cut them out using fabric scissors:
I created a simple template of phrases and sayings that I wanted my banner to be decorated in and used this to trace on to the cut banners in pencil:
To define the letters, Sharpies or fabric pens would work just as well as my weapon of choice, paint.  I picked up this rose gold shade from B&M for £1.  Using a defined, slanted paintbrush, I traced over the pencil in fine strokes and left to dry [which took almost no time at all]:
 Next, to thread the banner - this could be completed a number of ways - whether you apply a thin layer of glue at the top of the back of the canvas and lay the thread to dry in place, fold over the tops to create a hem and enclosed the thread within it, tape the thread in place or thread it with a needle as I did:
 Finally, to attach the banners to something that will hold in place on top of a cake [whatever kind] - food skewers.  I attached them simply by tying a knot either end of the banner and trimming the ends:

So simple and can be recreated to give yourself a life time of garlands, banners and other pretties.
see you next time x
Share:
© The Things She Makes | All rights reserved.
Blog Design Handcrafted by pipdig